
A question that comes up now and then is how to make your barn home possible by acting as an owner-builder rather than hiring a company to build your barndominium turnkey. Can you really save all that much? And is it worth the extra time and considerable effort?
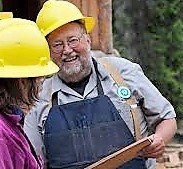
You’re a barndominium owner builder. How do you act as your own contractor? As an owner-builder you’ll spend 25 to 40 hours a week organizing and monitoring your project, overseeing everyone from plumbers and electricians to drywall companies and cabinet makers.
You’ll order all supplies, manage all the subcontractors, make sure the work is done professionally, and then complete the project at, or preferably under, the stated budget.
General contractors know a great deal about very specific topics such as how much things cost, how to get a discount, and where to find good subcontractors. If this isn’t your natural set of skills, you’ll need to spend a fair amount of time becoming knowledgeable in these areas.
Page Contents
What is an owner builder?
According to Wikipedia, “An owner-builder is an individual or family that takes charge of the remodeling or new construction of their home.”
Another way of putting it is to define yourself as someone who is willing to take on both the challenges — and the opportunities — of overseeing a building project as complex as a barndominium.
And, of course, there’s the added incentive of saving money. In some cases, a substantial amount of it.
And there are other benefits:
- You’ll be able to do only the tasks you feel comfortable doing, like painting
- You can be more in control of the timeframe in which your barndo is builT
- You’ll select only tradespeople you might know and admire
- You will have the satisfaction of saying later, “I did this myself.”
Pros and cons
While there is a lot to be said for acting as your own contractor, there are just as many things that could be said against it. Cost estimates double, there are many unexpected delays and then there are the hard-to-manage subcontractors
It can be maddening even if you know what you’re doing.
But let’s talk for a minute about what’s involved in being a general contractor, On the other hand, maybe it would be better to explain what he (or she) doesn’t do.
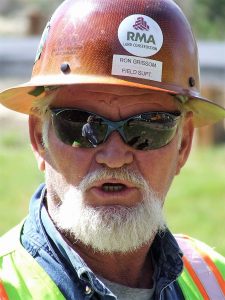
The General Contractor: duties and responsibilities
He doesn’t swing a hammer (or wield a nail gun), or put up drywall, or roll any paint on the walls. In fact, as a rule of thumb, he (or she) doesn’t do anything but assign construction tasks to others.
The general contractor is a liaison between the client, the person who helped you complete your house plans (if any) and the tradesmen (carpenter, plumber, electrician, etc.).
He is also responsible for ordering supplies, making sure the right permits get issued in a timely manner, and — to a greater or lesser degree — keeping up with all the paperwork that goes along with building your dream barndominium.
Be honest with yourself
This is no time to kid yourself about your handyman abilities. Building something on the scale of a barndominium is not for the faint of heart — nor those who are intimidated by a months-long, very intense building project involving many moving parts.
If you’ll be getting a construction loan to finance your build, you must absolutely have all your plans buttoned down and ready for scrutiny by lenders, who may be leery of trusting someone who has no general contracting experience with their investment.
In some states, owners are forbidden by banks to act as their own general contractors. And in some, you may be required to take a course to build on your own. Every state is different. We’ll try to determine in a followup to this article which states are unfriendly to owner builders.
And most of all, be very clear that if you’re married, this could put a huge strain on your family relations as you throw hours at the project, sometimes to the neglect of other family obligations.
Remember — once you start down this road, there is no turning back — for better or for worse.
Some other things to ponder
First things first.
Depending on where you live and where you plan to build, it’s a good idea to find out what kinds of permits you need to build your barndominium yourself.
So your first stop on your owner-builder journey should probably be the local planning office for a detailed chat about what you can — and more importantly can’t — do.
As part of your due diligence in prepping for meetings with lenders and county officials, it’s a good idea also to line up actual bids by actual subcontractors. Having a rolled-up line item request for funding can be key. Such detailed preparation can mean the difference between getting your project off the ground and leaving it firmly on the ground.
For example, you might save yourself a ton of trouble and expense by getting a bid for a “kit.” This is sometimes just called a “shell,” although some come complete with engineered foundation, doors and windows already installed. See this article for more information.
Check out your subs thoroughly
Similarly, if you can wrangle a list of reliable subcontractors from your barndominium neighbors, that will save you a great deal of trouble. Because without such a list, you are very vulnerable to tradespeople who might take advantage of your inexperience.
Get references that you can trust on all subcontractors and companies. Try to make sure they have liability insurance protecting you from an unpleasant occurrence on the worksite.
Also, be wary of bids that seem to be too low to be true. There’s probably a reason. And you don’t want to find out it was because the tradesman was a newbie too, just learning the ropes on your nickel.
Finally in terms of prep, total everything up in the way of expected costs. And then add 10% to it in the event of overruns. You can always give the money back, or never draw down on it at all.
Hold on. Still got your floor plans on the back of a napkin?
That will only do if you have located someone to translate it into firm plans that the subs can work from. This could be done perhap by a retired contractor. Someone who is willing and able to transform your rough vision into reality.
Better yet, spend a little extra and hire a good architect to create your blueprints. Often he or she can point out problems in your design and even add enhancements you never would have thought of.
And besides — it’s the only way to incorporate all those Pinterest features and images you’ve been saving up for months.
Time to get down to it.
Now that the warnings are out of the way, let’s see how to get ‘er done. Here’s a brief bulleted list of tasks that must be accomplished, more or less in order.
You can certainly attach target dates to each task, if you wish. But things change and you must be prepared to change with them.
The important thing to remember is the flow and order. You don’t want the electrician showing up after the walls have been insulated. Or the drywall installer to appear before the framing crew is done.
Okay, here’s the list of tasks to be done
Here are 25 action steps that will form the backbone of your barndominium owner builder journey.
We’re preparing a more detailed guide, with helpful tips, facts, hacks and pitfalls to be avoided from several owner builders who have been through this already and are currently living the dream. Click here to be notified when that guide — with a firm emphasis on barndo building specifically — becomes available.
****
- Gather ideas and inspiration
- Commit them to paper and refine them
- Seek information and guidance on how to become an owner builder in your state and county
- Begin drafting a customized plan, including quotes and bids from actual tradesmen and vendors
- Meet with lenders and secure financing, if needed
- Meet with county officials in charge of building permits
- Conduct final assessment of plan
- Put plan into motion by scheduling subs and workers
- Clear the site and develop infrastructure (road, septic, well)
- Order temporary utilities
- Pour concrete footings and the foundation
- Prep the slab for electrical and plumbing
- Pour the concrete foundation
- Erect the shell (if you are building a metal barndo)
- Frame the exterior walls (if you are building a wooden barndo)
- Put the roof in place (trusses, then sheathing)
- Frame the interior walls (metal or wooden barndo)
- Install rough-in electrical, plumbing and insulation
- Add insulation appropriate to your build
- Hang the drywall and install the trim
- Paint and finish the interior
- Stain and seal the concrete floor (metal barndos)
- Install flooring, laminate, tile or carpet (wooden barndos)
- Install cabinets and countertops
- Final cleaning and punch list
Got a project underway already? Join the Barndominium Life Facebook group and ask the question there. Or, over in the Barndominium Living Facebook group. With thousands of members monitoring posts 24/7, your chances of a quick answer are usually pretty good.