
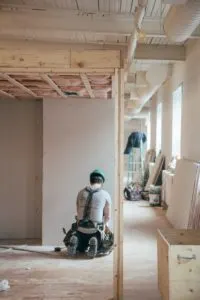
Erecting the metal frame is just one of the steps involved in building a barndominium. If you are building the structure from scratch, you also need to finish out the interior of your barndominium. Finishing a barndominium involves many of the same steps required for finishing a room in a standard home. However, some of the steps require a few additional considerations. Overlooking a step could result in delays or increased construction costs.
The following guide covers the main areas of how to finish out a barndominium, from installing insulation to mounting drywall and painting the walls.
Page Contents
Frame the Walls
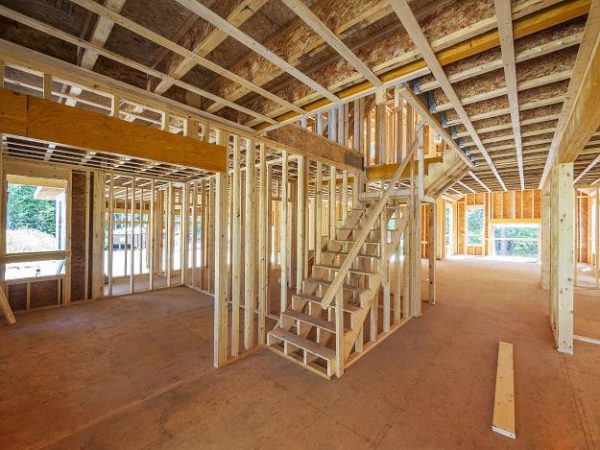
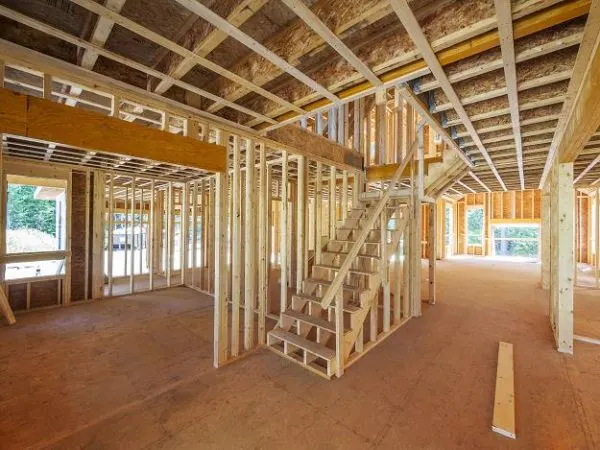
Framing the walls involves building the wood frames based on the floor plans of your barndominium blueprints. The outer walls should be framed first, followed by the frames for the interior walls, closets, and doors. Whenever possible, build the frames on the ground and then raise them.
Use 2x4s for the frames. The frame typically consists of four boards nailed together to form a rectangular. You should also add studs about 16 inches apart. The studs run vertically and increase the stability of the frame.
Raise the walls and secure them to adjacent frames. After raising the walls, add ceiling beams and joists. The beams are often spaced 12 inches apart when using 2x4s. The joists are installed perpendicular to the beams and spaced 16 to 24 inches apart. The drywall for the ceilings will later be mounted directly to the joists.
After framing the walls, you may need to cut some of the studs and frames to accommodate doors or windows. The frames for doors and windows are often built using additional 2x4s cut to length.
Install Insulation
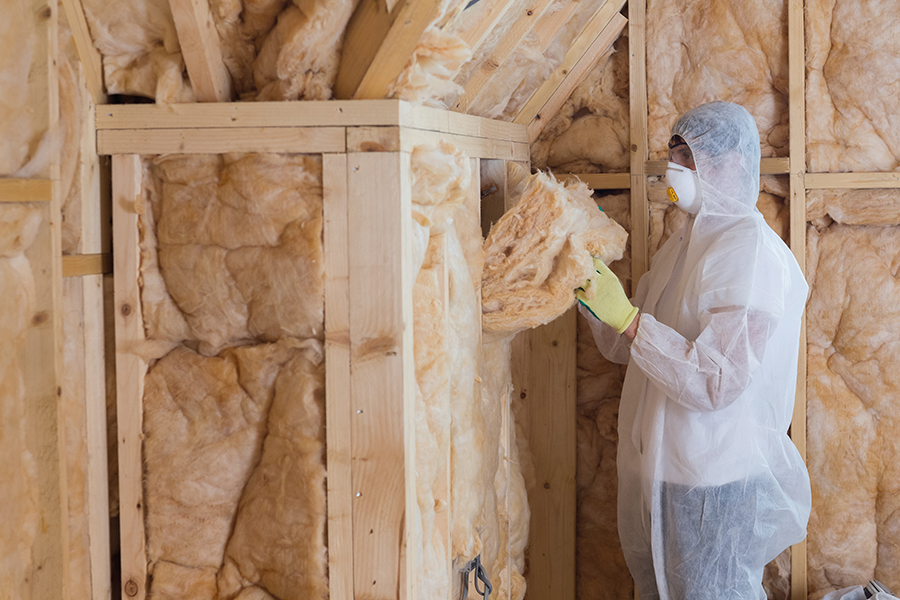
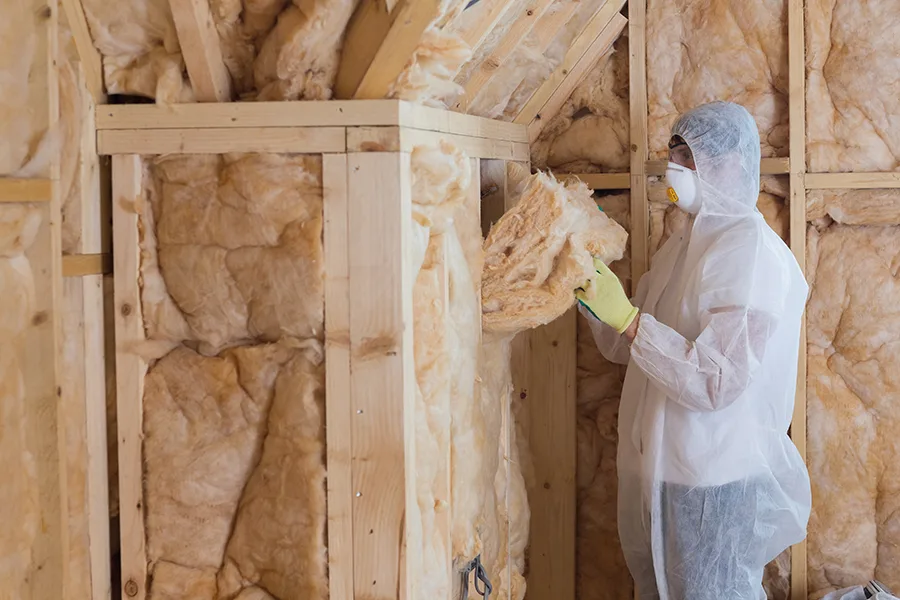
The exterior walls require insulation. The most common types of insulation include mineral fiber batt insulation and fiberglass batt insulation. Batting comes in rolls that you cut to length and place in the wall cavities. Compared to mineral fiber, fiberglass offers increased resistance against heat loss. However, it also costs a little more.
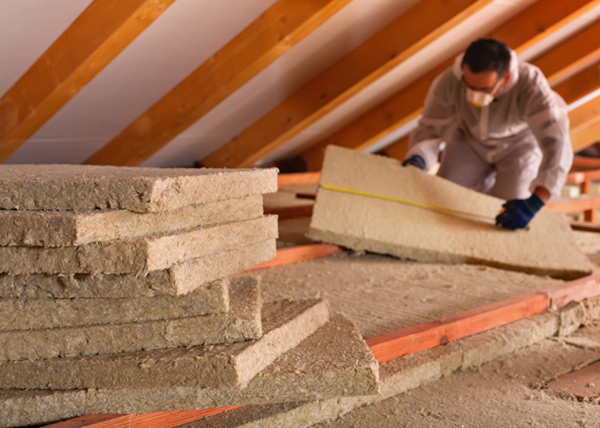

Both options are easy to install on your own. You simply need to measure the distance from the floor to the ceiling and subtract a quarter-inch. Cut the rolls of insulation to size and adhere to the exterior wall.
Insulated panels are typically found in commercial properties but can also provide an efficient solution for a barndominium. The panels include thick layers of rigid foam boards bonded together.
The main drawback is the cost, as insulated panels are often expensive and require more labor to install. The installation process is comparable to installing batting, but cutting the boards involves more work compared to cutting batt insulation. You may also need to use caulk to fill the seams between the panels.
Blown insulation (loose-fill insulation) is environmentally friendly and relatively inexpensive. With this type of insulation, cellulose is blown into the wall cavities. As the cellulose expands, it fills every nook and cranny inside the walls, providing better coverage compared to batting.
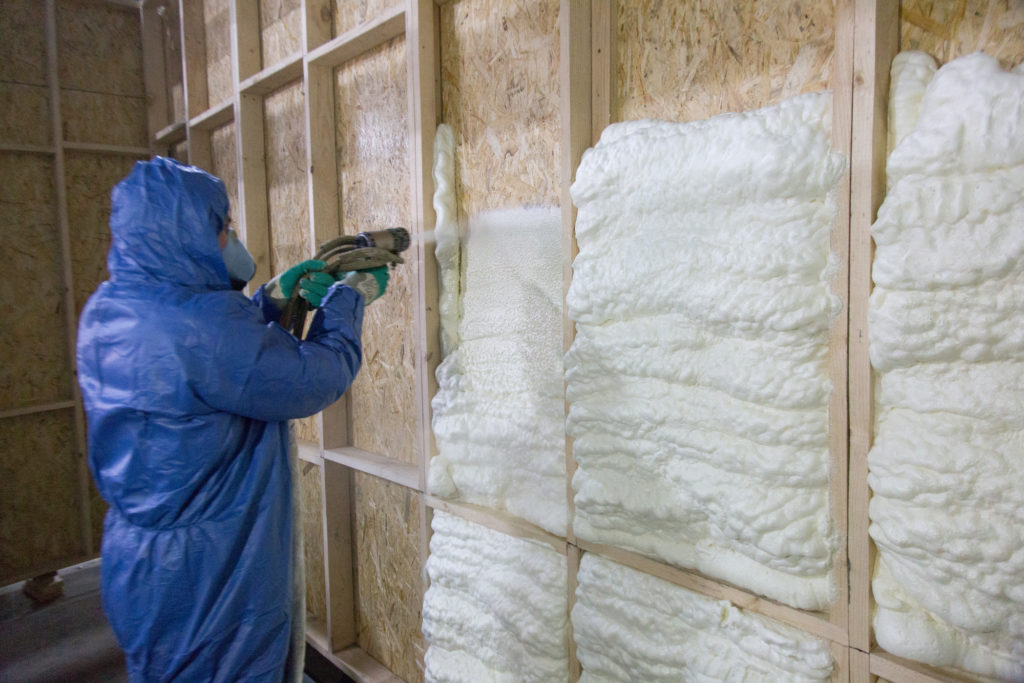
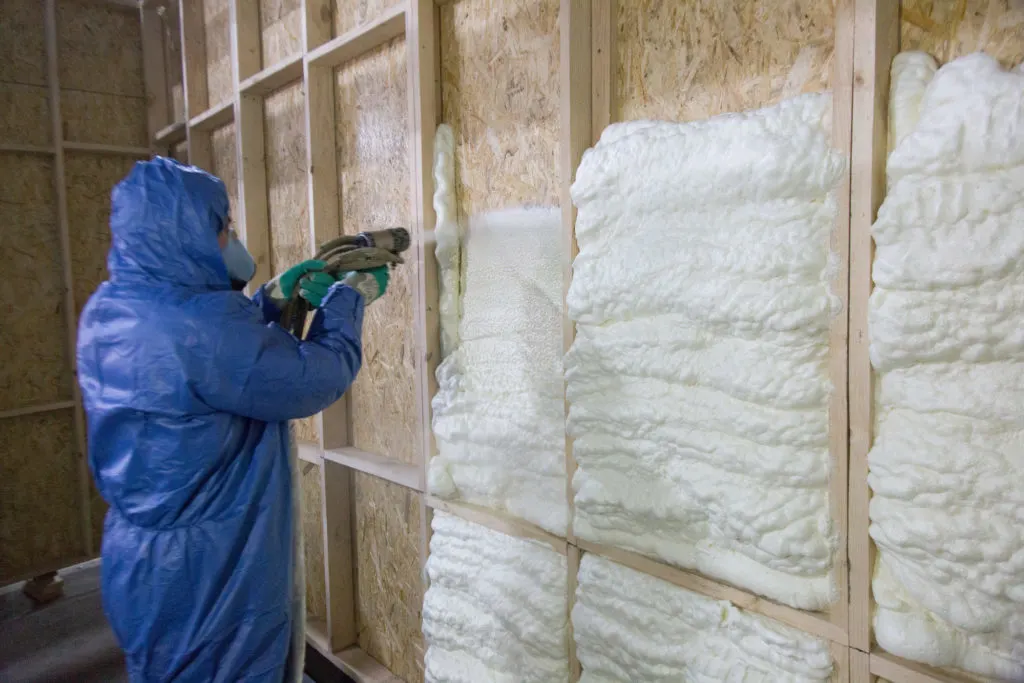
Many builders consider closed cell spray foam to be the best type of insulation for barndominiums. As with blown insulation, spray foam offers superior coverage. It expands to fill every corner. Both options are also resistant to mold and mildew. However, blown insulation and spray foam require you to install drywall before adding the insulation.
Install Utilities
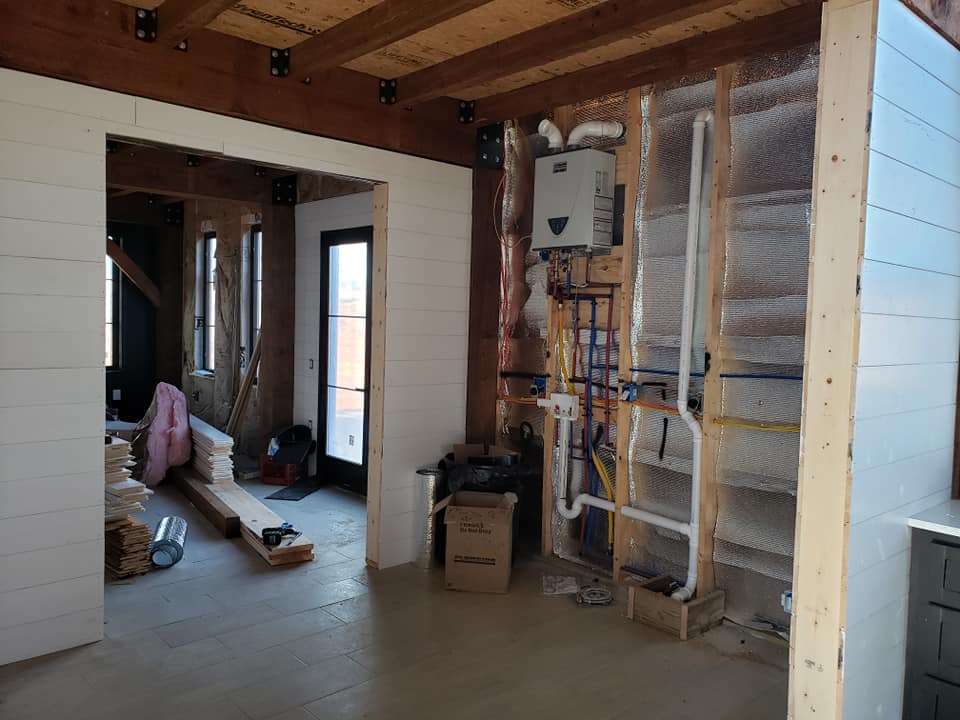

Add electrical lines, electrical boxes, switches, plumbing, and air ducts before framing your walls with drywall. The bathroom and kitchen involve extra steps due to the plumbing. Pipes for sinks, toilets, and bathtubs should be installed before adding the drywall. In most cases, it is easier to run pipe through exposed walls and flooring.
Install Drywall

The next step for finishing your barndominium is to install the drywall, which is also one of the most exhausting tasks. If possible, get help installing drywall. A half-inch thick 4×8-foot sheet of drywall weighs about 57 pounds.
The drywall sheets need to be mounted to the wood frames of the walls and ceiling, which is difficult to accomplish without assistance. If you cannot get at least one spare set of hands, consider renting or buying a drywall hoist. Drywall hoists or lifts support the drywall against the ceiling.
Hang the drywall on the ceiling before the walls. The drywall sheets on the walls help anchor the ceiling sheets. The drywall is mounted directly to the ceiling joists. Cut drywall to size and mount using drywall screws. Fill the seams and cover the screw heads with drywall mud. After completing the ceiling, mount drywall to the walls.
You can mount the drywall on the walls horizontally or vertically. However, mounting them horizontally is the preferred option in residential properties. It creates fewer seams and is easier to finish.
Paint the Rooms
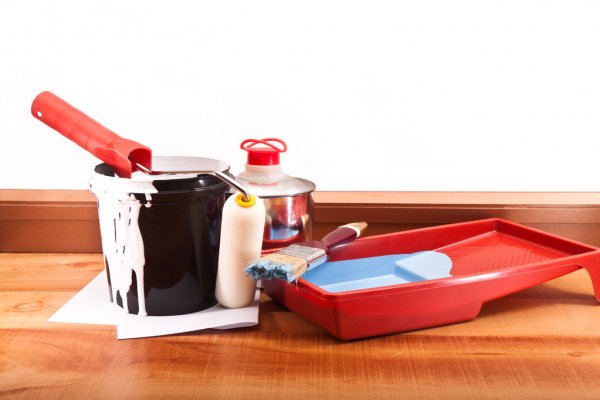

Paint the walls and ceilings before installing fixtures, covers, and flooring. Taking care of the paint job now allows for stress-free painting. You will not need to worry about protecting the flooring or covering everything.
Painting a room also requires a variety of equipment that may potentially damage your flooring. Large paint buckets and ladders may scrape hardwood or laminate flooring or leave a stain on the carpet.
If you plan on installing carpeting, painting first also protects against odors. Carpet fibers can trap the volatile organic compounds (VOC) found in paint, which may leave a lingering odor.
The drawback to painting first is that you may need to go back and retouch the paint job after installing the flooring. Adding hardwood or tack strips for carpet may leave nicks and dings in the walls. However, touching up paint is less of a hassle compared to trying to fix damaged flooring.
Mount Fixtures
Mount fixtures after painting the walls and ceilings. Add electrical socket covers, light switch covers, light fixtures, and ceiling fans. The electrical work should already be completed, allowing you to easily connect and mount fixtures and covers.
Finish the Flooring

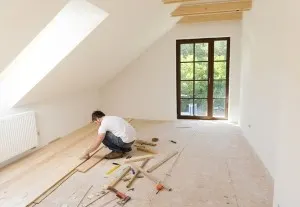
After finishing the walls and ceilings, finish the flooring. At this point, the interior should already have a subfloor. Common flooring options include carpet, tile, laminate flooring, and hardwood flooring.
Hardwood is the most expensive choice. Laminate flooring can provide a comparable look at a fraction of the price. Tile is typically used in the kitchen, bathrooms, and areas that receive a lot of foot traffic, such as entrances and foyers.
If you are installing radiant flooring, you may want to avoid carpeting. If the carpet is too thick, the radiant heating system cannot efficiently transfer heat.
Additional Considerations
You may want to wait until you finish the flooring before installing appliances, toilets, and tub or shower. The plumbing and electrical should already be installed, making it easy to add the final appliances and complete your barndominium.
Conclusion
Finishing out a barndominium involves a lot of steps, some of which are easier to accomplish with help. You may even handle the entire project on your own. However, make sure that you consider the order of the steps.
For example, if you plan on using blown-in insulation or spray foam, you need to mount the drywall for the outer walls before adding insulation. If you want to use batting, you perform these steps in the reverse order.
Keep in mind that this is just a summary of how to finish out a barndominium. Before you start installing insulation or framing the walls, make sure that you fully understand the required steps. Do not hesitate to contact an experienced contractor for help on one or more areas of your new home.