
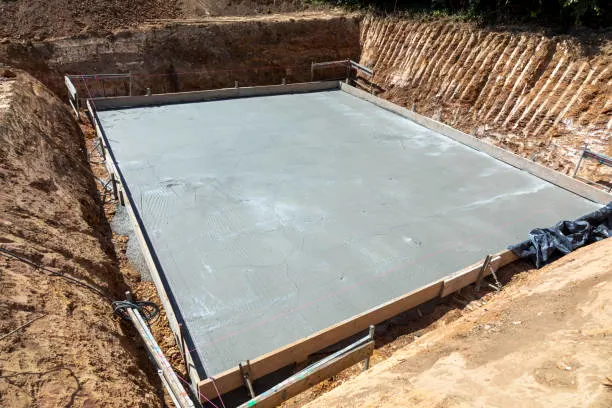
Barndominium concrete floors have always been a popular feature of barndominiums, and if you’re mapping out your own barndo project, you may be planning this option.
Whether it’s for its aesthetics, durability, or cost-effectiveness, installing a stained concrete floor in your barndominium is an easy way to customize your interior aesthetics and can be a great DIY project to contribute to the larger construction of your barndo.
Page Contents
Barndominium Concrete Floors
In today’s post, we’ll go over some key pieces of advice for installing a stained concrete floor in your barndo, and go over some of the key things you should consider throughout the project.
Can you Stain an Existing Barndominium Floor?


If you already have an existing concrete floor that you’re hoping to stain, you first need to establish whether it’s suitable for staining with a spray test. Your flooring needs to be fairly porous to absorb the stain, and with sealed or polished concrete, this typically isn’t the case.
Figuring out whether or not you can stain your concrete floor is simple. Simply spray the floor with a light coat of water. If the concrete goes dark, that’s a good sign that it can take the stain.
The Pros and Cons of Stained Concrete Floors

One of the main drawbacks of staining is that it’s not a catch-call solution for existing concrete floors.
Each separate concrete floor will have its own nuances, and some floors will give you better results from staining than others. If your floor has been installed for a while, and it’s starting to show its age with a lot of cracks and pits, then you shouldn’t go in thinking that staining will camouflage it.
Staining isn’t the same as painting, and while it will brighten up a concrete floor with a translucent tint, it won’t completely cover up rough patches and blemishes. This is especially true for concrete that’s been exposed to moisture for a while, as this can draw out the process of drying and sealing.
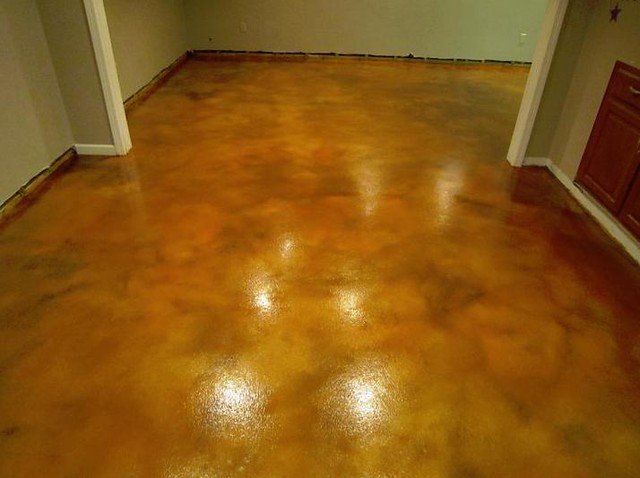
On the flipside, staining is a hugely cost-effective way to customize the aesthetics of your new home, promising considerable savings compared to high-gloss concrete polishing or epoxy treatments.
Once applied, concrete stain is also highly weather-resistant, and will look great for years to come both inside and outside your barndominium.
Choosing a Stain

It’s also important to know what kind of stain is best for your needs.
There are two main stains to use for concrete floors; acid stains made with a hydrochloric acid base, and water-based stains which are made with artificial pigments and polymers.
Acid stains work by causing a chemical reaction with the lime in the concrete and binding to the surface. This means that the end result will have a slightly mottled texture to it. This tell-tale aesthetic of acid-stained floors is part of the appeal for a lot of people, but if you’re looking for a smooth, consistent coloring across the whole floor, then it’s best to avoid acid stains.
Water-based stains, on the other hand, are made to soak into the porous surface of the concrete. Because it works through absorption rather than a chemical reaction, it will give your floor a more uniform, consistent coloring. Without the chemical reaction aspect, water-based stains are also a better choice when you’re staining poorly ventilated spaces like basements.
How to Stain a Concrete Floor
Step 1 – Preparation
The first thing to do is to give the concrete floor a thorough clean. Sweep or vacuum up any dust and debris, then scrub it rigorously with a stiff-bristled brush and a good concrete cleaner to get rid of any dirt that’s been worked into the pores of the concrete.
If you’re staining the floor of a shop, there may be some especially stubborn oil or grease spots on the floor. If this is the case, you may need to work in a paving degreaser and clear it with a pressure washer to get the surface 100% clean.
After cleaning, leave the concrete to dry for around 24 hours before moving onto the next step…
Step 2 – Applying the Stain
Next we have the fun part, actually applying the stain!
With both acid and water-based stains, you should mix the staining solution according to the instructions in a hand-pump sprayer. If you opted for an acid-based stain, make sure you get a pump without metal parts.
You’ll also need to wear safety equipment when acid-staining your concrete. Thick gloves, goggles, a respirator, and a long-sleeved shirt are all essential to protect you against potentially serious health hazards when acid-staining concrete. You should also try to ventilate the area as much as possible, even with an industrial respirator.
When applying the stain, be sure to spray it steadily and evenly, moving across the surface in a slow, methodical fashion from one side to the other. It’s a good idea to keep a soft brush or cloth on-hand to spread the stain into hard-to-reach areas.
While acid stains will deepen over time as they react with the concrete’s lime, water-based stains can often require a few coats to get the desired result.
Step 3 (Acid Stains Only) – Adding a Coat of Neutralizer
When using an acid-based stain, you’ll need to neutralize it to stop the reaction before rinsing the floor off. Baking soda or trisodium phosphate will work well for this task. Just dilute it according to the manufacturer’s instructions and work it in with a brush.
Step 4 – Sealing the Floor
Finally, apply a second sealing coat once the floor has had the chance to dry fully. This will protect the concrete from wear over time, and help give the whole floor a professional, finished look. You my want to apply additional coats past this to achieve the look you’re going for, just make sure you’re leaving enough time in between coats for the stain to dry.
To keep your concrete floors looking great, we recommend re-sealing with another coat once every 6-12 months.